 Read all the claims by manufacturers of chalk type paint and you might be inclined to grab a paint brush and start painting your favorite thrift store find or an old piece of grandma’s furniture. Most of them claim NO NEED for sanding, stripping or priming. Well, if you want a quality piece, don’t be so quick to start slapping on paint.
By no means am I against using a chalk type paint, I’m just saying that proper preparation will save you many headaches in the end. You can put lipstick on a pig, but it doesn’t necessarily make it pretty. Chances are that pig is dirty from rooting in the mud and probably has dirt packed in its hooves. But if you give that pig a bath and clean up the filth first, the lipstick will make it look much better.
Believe me, it’s worth the effort to take a little extra time to assess your piece properly before picking up that paint brush. There are 4 steps that you’ll want to commit to memory in knowing how to prepare furniture for painting.
Assess and make any necessary repairs
The following is a list of areas to look at when preparing furniture to paint:
- learn how to identify it’s solid wood or not – if so, what type of wood is it? This will become important when knowing when primer is necessary.
- pull out the drawers to see if they are fully intact – sometimes the joints will need a little glue or the bottom may be coming loose and will need to be put back in place
- look over the surface areas to see if any of the veneer is pulling away or missing – it may need to be glued down, replaced, or removed all together
- check to see that the back panel is securely attached to the body of the furniture – if coming off or loose, you’ll need to tack back into place
- wiggle the legs to see if there is any movement – they may need to be tightened
- are there any holes or gashes that will need putty?
- do any wheels need to be replaced? or will you remove them all together?
- is the hardware missing? Will the existing hardware work with the new paint scheme? Will you need to drill or fill holes if replacing hardware?
These are the most common things to expect, but the list of repairs could go on and on. These are all things you will want to look for before buying a piece to paint. If you have not become proficient in making repairs or have someone helping you who is, you might want to pass on that particular piece.
Clean thoroughly
 Using a soft damp rag along with a good all-purpose cleaner wipe down all surfaces. Wipe immediately afterwards with a dry rag. My favorite cleaning product is called CitraSolv – it is a concentrate so you’ll have to mix with water. It smells wonderful and there are no harsh chemicals.
With your shop vac clean out any sawdust, spider webs, etc. that may be hiding in the recesses of the interior of your piece.
Using a razor blade scraper, gently peel off any tape or stickers (or bubblegum) you may find. If there is any sticky residue left, use a tad of Goo Gone to clean that area.
Sand if necessary
Depending on the condition of the piece, this process may not be necessary. Run your hand over the surface of the piece to see if you feel any raised areas, especially if putty was used to fill screw holes or dings. Sand them down until flush with the furniture surface using 220 grit sandpaper. I like to use sanding blocks as they are washable and reusable.
If the furniture has a smooth finish from having a top coat, you’ll need to sand the entire surface in order for the paint to stick. It doesn’t take much sanding, but going in the same direction as the grain, using the 220 grit sandpaper, roughen up the surface a bit.
If there are stains, try sanding over them first to see if they’ll disappear. If not, you’ll want to use primer in that area.
After any sanding you’ve done, go back over those surfaces with a damp cloth so you have a nice clean surface. Use the shop vac again if necessary for any dust that fell into the interior sections.
Prime if needed
I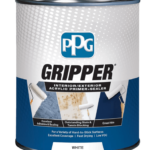 f you identified the piece as laminate or if it has a slick surface you’ll need to use a bonding primer to prepare the furniture for painting. I like to use a product by PPG called Gripper as it provides great adhesion, but also blocks tannins in the wood so there is no bleed through after painting.
If someone wrote on the piece with permanent marker, painted it with nail polish, or used stickers on the furniture you’ll most likely need to use a primer. If the furniture is made out of mahogany or pine, you’ll definitely want to use a primer to block the tannins. Often used furniture is splotchy and that will show through the first and sometimes second coat of paint; this can be prevented with a coat of primer.
It’s actually not a bad idea to get into the habit of priming your pieces of furniture before painting. A good primer will give you an overall solid color to paint over. White primer under colors such as red is very hard to cover so I recommend tinting the primer gray, it works much better.
Now comes the FUN part
The preparation stage might not be your favorite, but I promise that if you take the time to go through the 4 steps outlined above they will prevent you many headaches. It will take some time to learn how to identify different types of wood and how to make repairs, but the more you do it the easier it will become. Once you have taken the time to prepare your furniture for painting, it is finally time to get that paint brush out and have fun.
What a whole lot of awesomeness!
I didn’t know the pre-steps before painting was this easy. That is what has been putting me off painting my old study table myself as I have been afraid of messing it all up in the process of painting. Even thought of swapping it out for a new one, but couldn’t as it is my beloved sentimental value.
Anyways, no need to worry anymore, I think I can do the painting now by following this explicitly explained steps. I even have a mnemonics for it “ACSP”-assess, clean, sand, & prime.
But I do have a question which is, how can I identify what kind of wood it is? Is it just by looking at it, or is there any other way to tell that?
Thanks for putting this post together that has helped someone like me.
Tohin,
I’m so glad you find the steps easy to follow! To answer your question, it takes time to learn how to identify the types of wood and even how to tell if it’s actually wood or some other man made product. Here is a good article that may help.
Best wishes as you tackle your study table. I’d love to see pictures 🙂
PAM